


Today I channeled 19th century England to create a dainty spot of time-period handiwork. When it came to picking an appealing historic craft, the choices were slim. I could stand over a vat of wax all day and dip candles ad nauseum, I could embroider a cushion until my hands seized with Carpal Tunnel syndrome, or I could try my hand at quilling paper. Given my options, I chose the latter.
Quilling (or rolling paper to create decorative designs) has been around since the Renaissance. During Jane Austen's era, it was considered an acceptable form of diversion for women of leisure and their "gentle dispositions." My disposition is far from "gentle," but being a "lady of leisure" sounds dreamy. However, with a houseful of kids, pets, and neighbor kids and their pets, it is unlikely to happen anytime soon. I guess quilling paper is as close as I will ever come to ladylike diversion (unless you consider folding laundry while watching "Downton Abbey" as a ladylike diversion . . . )
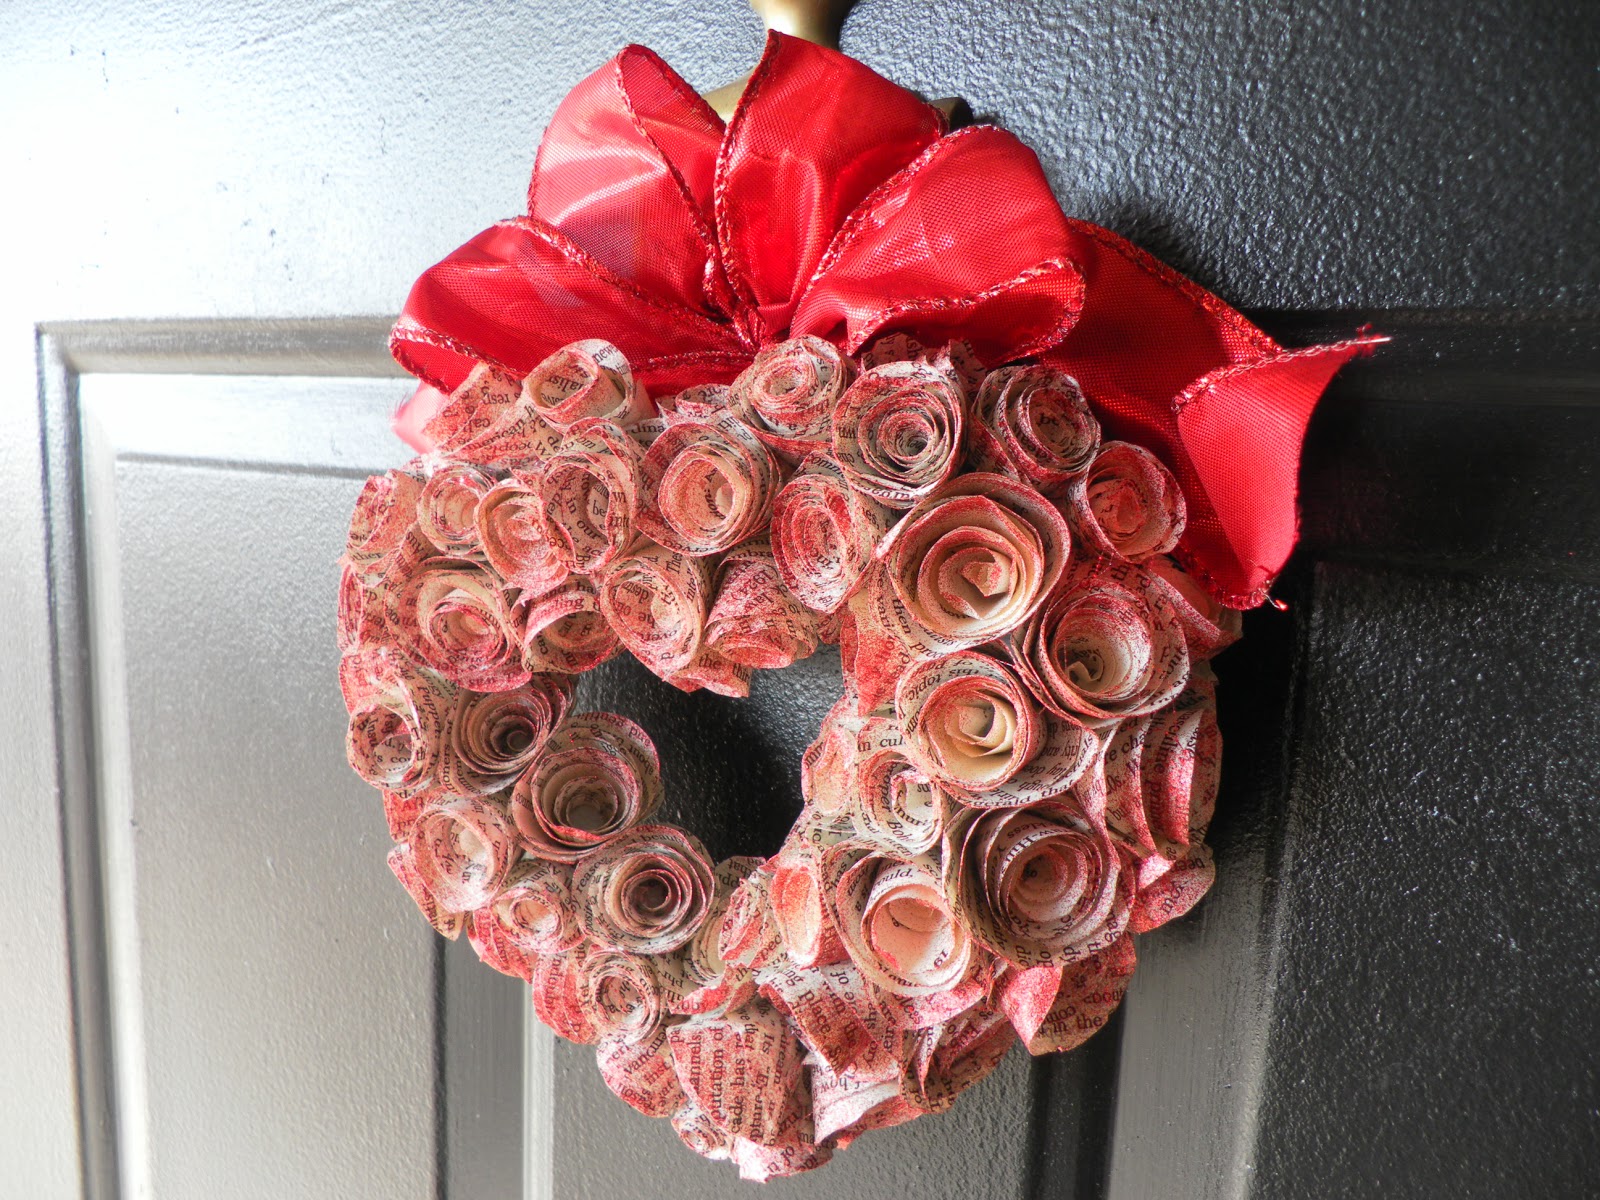
With Valentine's just around the corner, I decided to combine the art of quilling with my love of books to create a wreath of "written" roses.
Here is what I did:
1. I rounded up my glue gun, a foam heart wreath from the craft store, some pink glitter spray paint, and several pages from an old book. (Don't worry. No good novels were harmed in this experiment. However, a theory book from college that cost way too much and got read way too little met its end in this project . . .)

2. I traced a lid onto the pages and cut out the circles.

3. Starting at the outside edge of the circle, I cut it into a 1/4 inch to 1/2 inch spiral.

4. I then wrapped the outside end of the spiral around a skewer and continued to twist the paper into a tight roll. Make sure you keep the bottom of the paper lined up as you roll so that the top will begin to flare out like a rose petal.

5. When I was done rolling the papers, I set them on table and let them relax (unfold) a bit so they looked more natural. I then glued the base of the flowers to the foam heart. And repeat. And repeat. And repeat until the heart is covered. (I only did the front of the heart so I could hang it flat against my door.)


6. I lightly sprayed the wreath with some glitter paint, tied a ribbon to it, put it on the door, and voila! "Ladies of leisure," here I come!

Linking up:
Oooo - I like this one. Shall I make it or just pin it? ~ Maureen
ReplyDeleteHaha. The proverbial question: To make or to pin... :)
DeleteAhhhh! That is adorable Erika!
ReplyDeleteThis is AMAZINGLY gorgeous. I may have to make myself one of these! <3 <3 <3
ReplyDeleteOh wow - I am so impressed. That looks professional!
ReplyDeleteThis is stunning! Beautiful work!
ReplyDeleteHi! Visiting from tt&j. This is awesome! I love the finished product. I have been thinking of making one but thought it was too difficult.. I may try it soon! :)
ReplyDeleteIf you get a chance I would love for you to share this at my party :)
I seriously love this! The book pages look lovely! I hope you will link up with me here:
ReplyDeletehttp://www.thegingerbreadblog.com/2012/02/sweet-saturday-link-party-v25.html
This is truly beautiful, my friend. Nel would love this because she reads so many books. You spent time on this project and it paid off, because it's one of the sweetest things I've seen. GREAT JOB!!
ReplyDelete~Sheri at Red Rose Alley
What a beautiful project! What patience you have! Thanks for linking up! :)
ReplyDeleteSo pretty! I love that you used book pages. I found you through Flamingo Toes. Thanks for sharing! :)
ReplyDeleteLove this idea! I love anything that recycles books into something pretty. I had to pin it and share it on my CraftBliss Facebook page. ~Dee
ReplyDeleteWow! That's pretty amazing. Just beautiful. How long did it take?
ReplyDeleteIt's beautiful! I love the touches of pink!! I would love for you to stop by and link up here:
ReplyDeletehttp://www.twindragonflydesigns.com/2012/02/inspiring-creativity.html
xo
Heather
Thanks for showing us how to make those darling rolled roses! I saw your post over at Savvy
ReplyDeleteSouthern Style.
SOOOO romantic!!!! I LOVE IT!!! I want to make one today!! andrea@townandprairie
ReplyDeleteThis is gorgeous!!! I love how you tinted the book pages. If you'd like to share it at another party, I host Kiss & Tell over at I Gotta Create! A new link goes up tonight. <3 <3 http://igottacreate.blogspot.com/2011/12/kiss-and-tell-craft-craze-4.html
ReplyDeleteVery original and so very festive!
ReplyDeleteBeautiful! I Have done this but much smaller.Thanks for sharing.Joann
ReplyDeleteL.O.V.E. this wreath! I just started my link party. Come and join us! Smiles,
ReplyDeleteJill
http://jaihartjustlovelydesigns.blogspot.com/2012/02/sundays-are-lovely-6.html
This is just the cutest thing!! I love it!
ReplyDeleteSo pretty! I love how you just added a touch of red. I'd love for you to share this at my very first link party.
ReplyDeleteRachel
http://adventuresofadiymom.blogspot.com/2012/02/terrific-tuesdays-link-party.html
I love this wreath! Beautiful twist on the book page wreaths. I pinned it. :)
ReplyDeleteThis is absolutely beautiful. What a great idea. You did a really great job! I would love if you would consider linking this post up to my Drab to Fab party tomorrow (Friday) on my blog Sugar and Spice. We celebrate making the ordinary extraordinary and this embodies that theme, so I'd absolutely love to see you tomorrow! Here's a link for more info:
ReplyDeletehttp://www.amynjesse.com/p/drab-to-fab.html
Amy
Your wreath is beautiful and makes quite the statement! I've made those flowers with felt, never thought to make them with old book pages. Thanks for sharing. I'm visiting you via At The Picket Fence's Inspiration Friday, and just started following you.
ReplyDeletehttp://www.laurieslittlebitsofcreativity.com/
So cute! I would love for you to share it at my Valentines Party @ www.cheapcraftymama.com!
ReplyDeleteThis is gorgeous! Definitely pinning...
ReplyDeleteThis is truly a work of art! Thanks for linking at Once Upon a Weekend! You're being featured tonight!
ReplyDeleteThat is really pretty. I wish I had the patience to do that kind of tedious craft. Thanks for sharing at Wow.
ReplyDeletePretty! Featuring you tomorrow!
ReplyDeleteWow, totally gorgeous! I will indeed be making one of these! Thanks so much for sharing. I am your newest follower and LOVE your blog. Tabitha@ Simplyhomecents.blogspot.com
ReplyDeleteThis is really so pretty. I love making these roses and this gives me another excuse to make more. Stop over my blog for my giveaway.
ReplyDeleteI would love to feature this on my blog but I'm new to blogging, so I'm not sure how to do so. Could you please email me. The spray glitter added the best touch to this but it is gorgeous!
ReplyDeleteI really love this. Wonderful.
ReplyDeleteToo Cute!! I love it! Thanks so much for linking up!!
ReplyDeleteXO, Aimee